So, now that you can embrace the beauty of Kintsugi and you can see why people might look to embrace it and use it to their advantage, it’s time to look at something else that we think is very important: how do you actually carry out a Kintsugi process?
Really, it’s not so tough. The first thing that you need to do, though, is pick up a Kintsugi Kit. You could buy everything yourself, but what is the point? You may as well pick up everything in one neat little package. This gives you all the tools that you are going to need if you want to start carrying out the aspect and art of Kintsugi application. The Kintsugi aim is simple: you take a piece of damaged equipment, like a piece of pottery, and you use gold to fill in the cracks and add an extra layer of attention and artistry to the finished project.
Really, the entire practice is very simple, and most of the time it can be broken down into three smaller steps and sections. If you wish to carry out a full Kintsugi repair, then you need to get the following three points down.
What do I need?
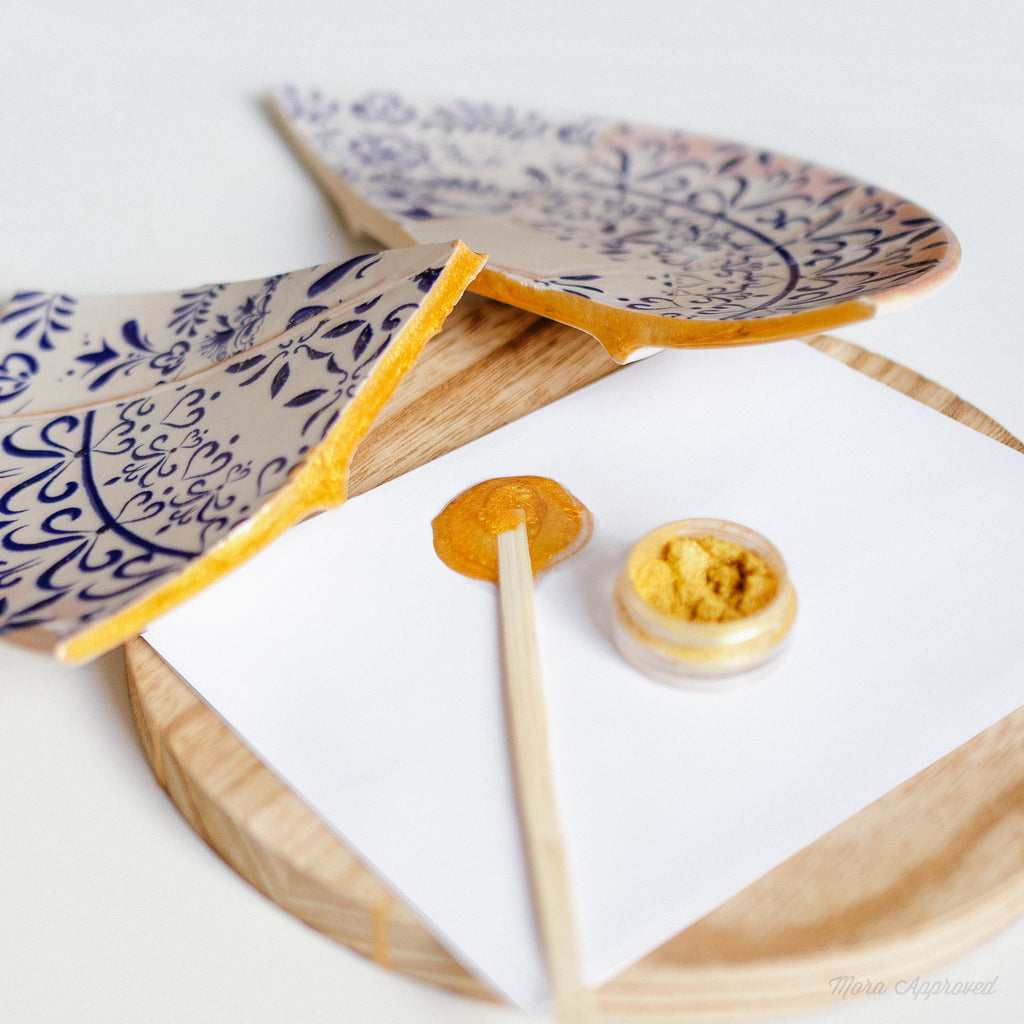
As mentioned above, you should buy a Kintsugi Repair Kit instead of trying to find it all on your own. You can often find alternatives, but they might be as good or as ready for Kintsugi. So, to start off, you will need the following:
- A set of Epoxy glue.
- A package of colour powder .
- A paintbrush set that allows for easy application in tight areas.
- A mixing stick to help put together your solution.
- A pair of gloves, preferably disposable, for easier clean-up when finished.
- Something to fix!
Getting Started
So, to begin with, the first thing that you want to do is get your broken pot, vase, bowl – whatever it is that has been broken. You can use Kintsugi on things like ceramic, but it should work with a wide selection of different substances. Your Kintsugi Kit should break down what it does and does not work on.
So, take your pot and then make sure that you have all the pieces. As mentioned before, missing parts of sections that might no longer fit perfectly due to chipping and/or fracturing can be filled in with the golden substance, so do not worry about that side of things.
Want to break something just for this?
Then take the item that you wish to break and wrap it up in a tea towel.
Then, put it in a bag. Drop it from a safe height, and watch it smash on the ground. The towel should contain all the pieces, and the bag will make sure that your item does not go anywhere else when you drop it.
Fitting It Together
The next thing that you now want to do is that you want to get fitting the pieces together again as one. This is quite easy; it’s like doing an old-school jigsaw. Start laying the pieces down next to one another, and then try to put in place a simple plan that can help you to keep it all numbered so that you can put it back together.
Try and lay out an old dustsheet, for example, and write small circular sections with numbers on it. Number each part and try to lay them out as best you can.
This should allow for a more chronological fitting when the time comes. Once you do this, then you want to make sure that you follow along with this simple plan and you should have it all sitting out in shape, in place, and in position.
Now that you have a plan of what to do and where parts will go, what next?
Piecing It Together
The next step is the hardest part, and where most of us have our main troubles. The aim here is simple, though; you want to get all the items out of your Kintsugi Kit. Now, start mixing together the Japanese gold repair powder that you were given as part of the package.
This will be mixed together with the Epoxy glue. Keep doing this using your mixing stick. We recommend that you do this until you can see it has clearly mixed right. Now, you want to start lightly applying this to the edge of your pieces using the paintbrush. Get as much on there as you can!
Now, once you have two conjoining pieces sitting next to each other, get the epoxy on the side and then push them together. Be gentle, mind. We recommend that you take this slow, and that you do it all piece-by-piece. You will be shocked at how fast this all starts to dry out, hence why you want to have everything prepared and in place for easy assembly and connection.
That is why you should not put out any of the items that you get with the Kintsugi Kit until you are 100% sure you are ready to start fitting it all together. Be as quick as you can, but also be careful when you are pushing pieces together.
As you keep going, you will start to see each part of the project come together and leave a nice, secure finish. You can choose the kind of finish that you want; some go for a smoother and simpler finish, while others will go for a bulky finish. It really does come down to artistic preference; you just have to be decisive on how neat you want to be, really!
And now you are done!
Once you piece it all together (moving as fast as you can), you should be left with a fully corrected piece of equipment. Whatever it is that you chose to fit back together, the simple method above should make it very, very easy for you to put it all in the one place without a single bump in the road.
Still have any questions? Then watch this easy tutorial we prepared for you: